
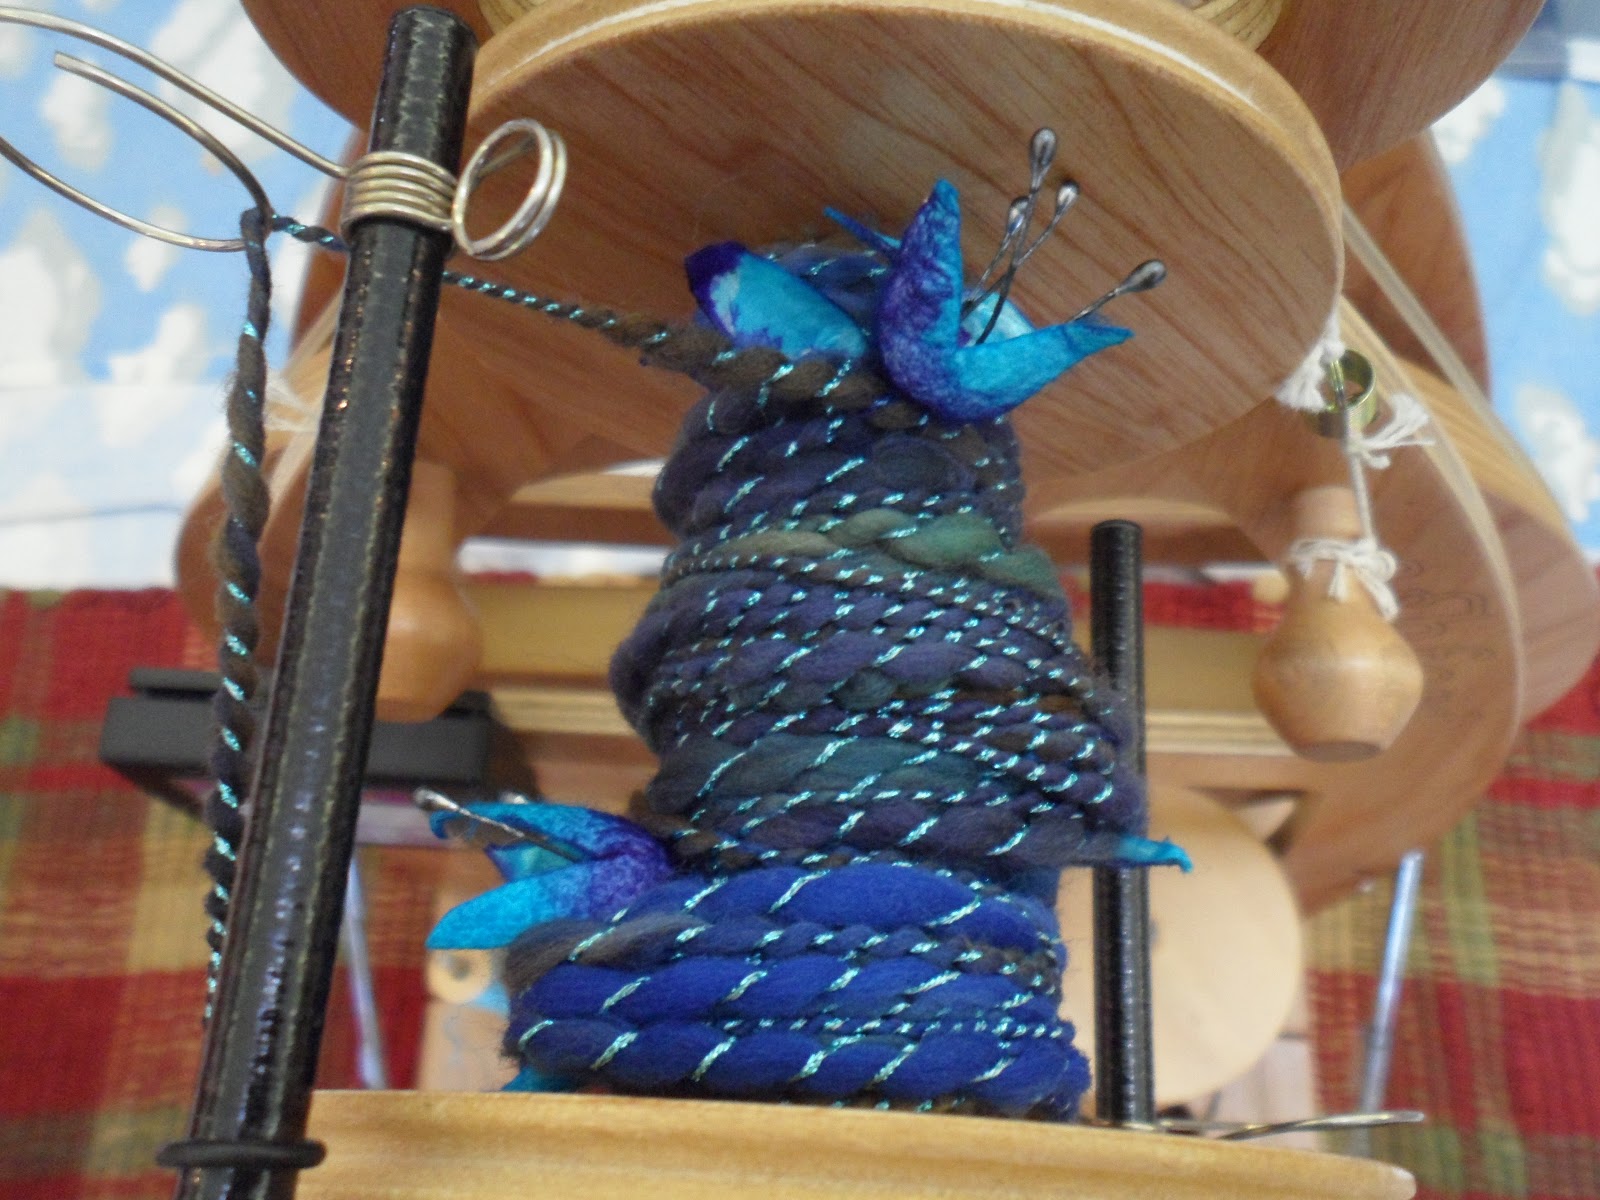
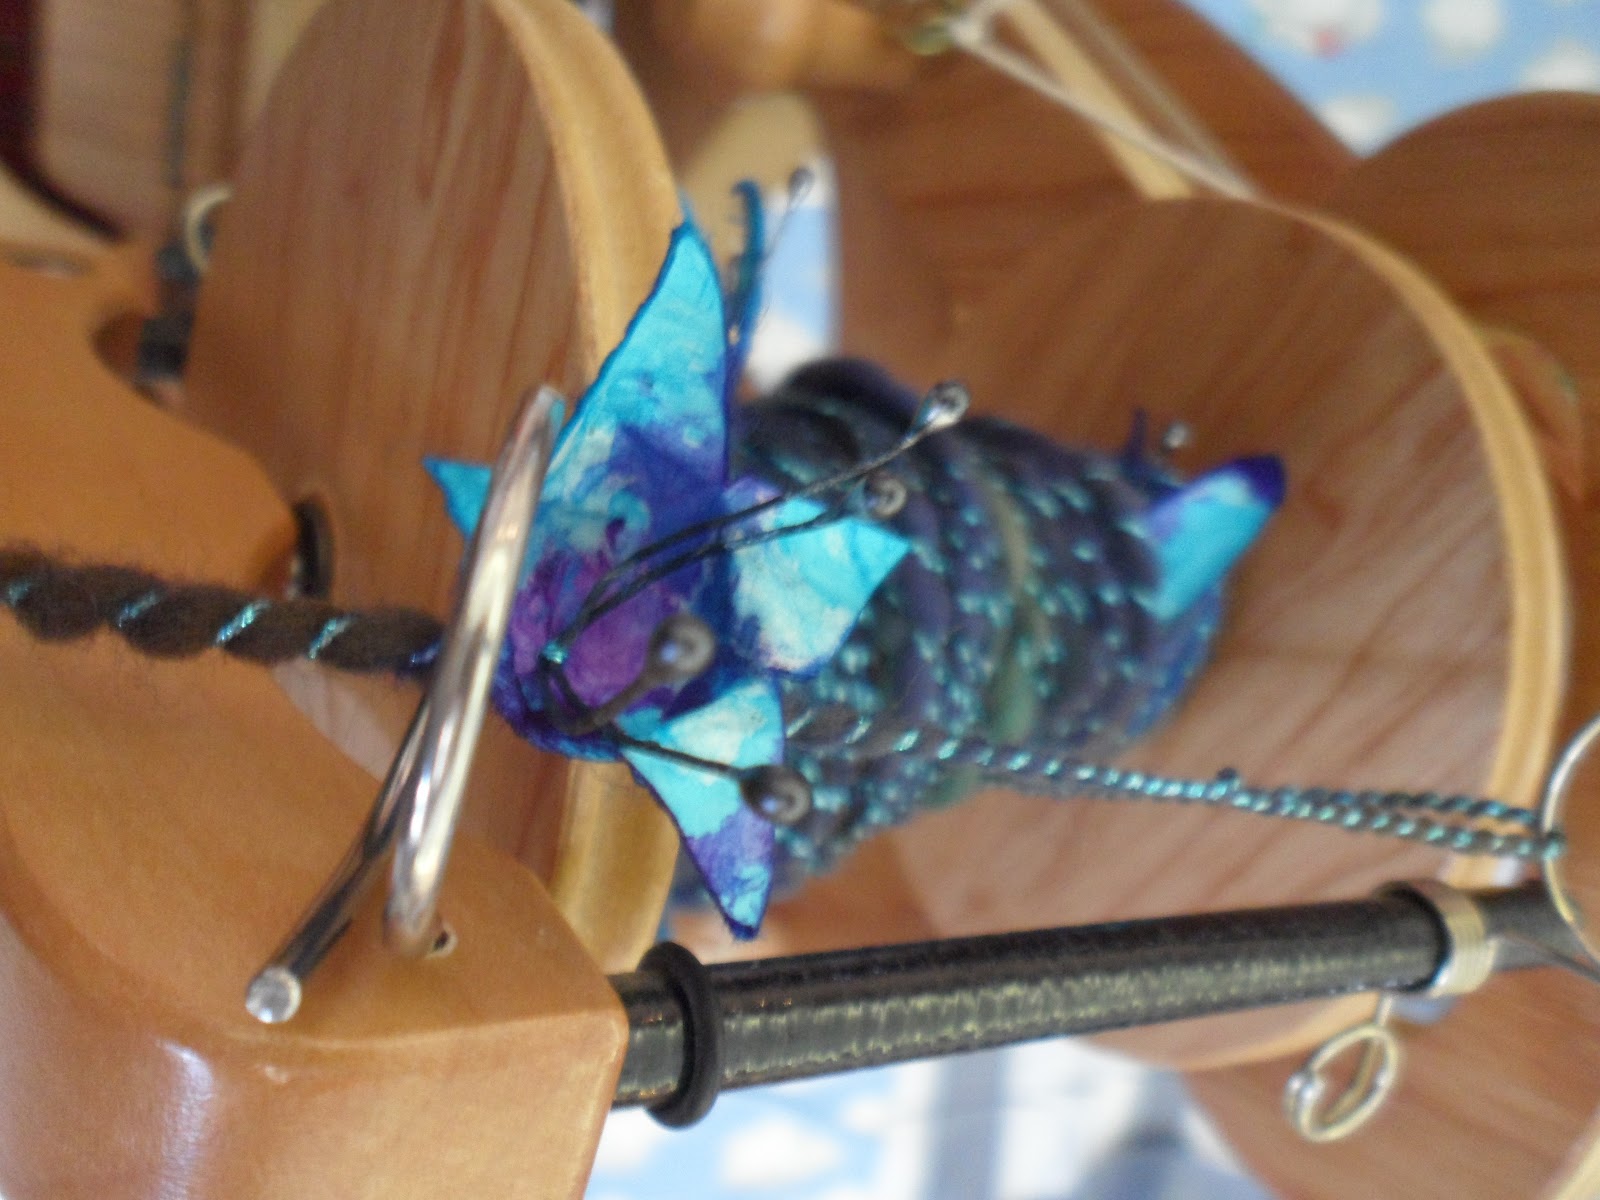
Please, before
you start out be sure to check that you will be able to put your silk
cocoon flower through your orifice. They are quite forgiving as to being pushed
through the orifice and helped over your flyer hooks. As for bobbins? Size does
matter. The bigger the better! My pictured sample was produced on an Ashford
Joy with Freedom Flyer.
Of course there is no reason why you can’t do this technique
with a spindle.
All is not lost if your wheel’s flyer cannot take in the
cocoon flowers and you are not a spindler as you can attach your flowers to
your finished yarn by securing them with sewing thread.
Flowers:
- Whole, undyed silk cocoons Oh, and that rattle you hear? That’s the silkworm.
- Sharp exacto knife or scissors
- Toothpicks or bamboo skewers
- Craft painting brushes. Japanese calligraphy brushes are ideal
- Silk paints
- Paper towels
- Styrofoam block
- Steamer or double boiler (non-food use only)
- Rubber gloves
- Old towel
- Craft flower
stamens
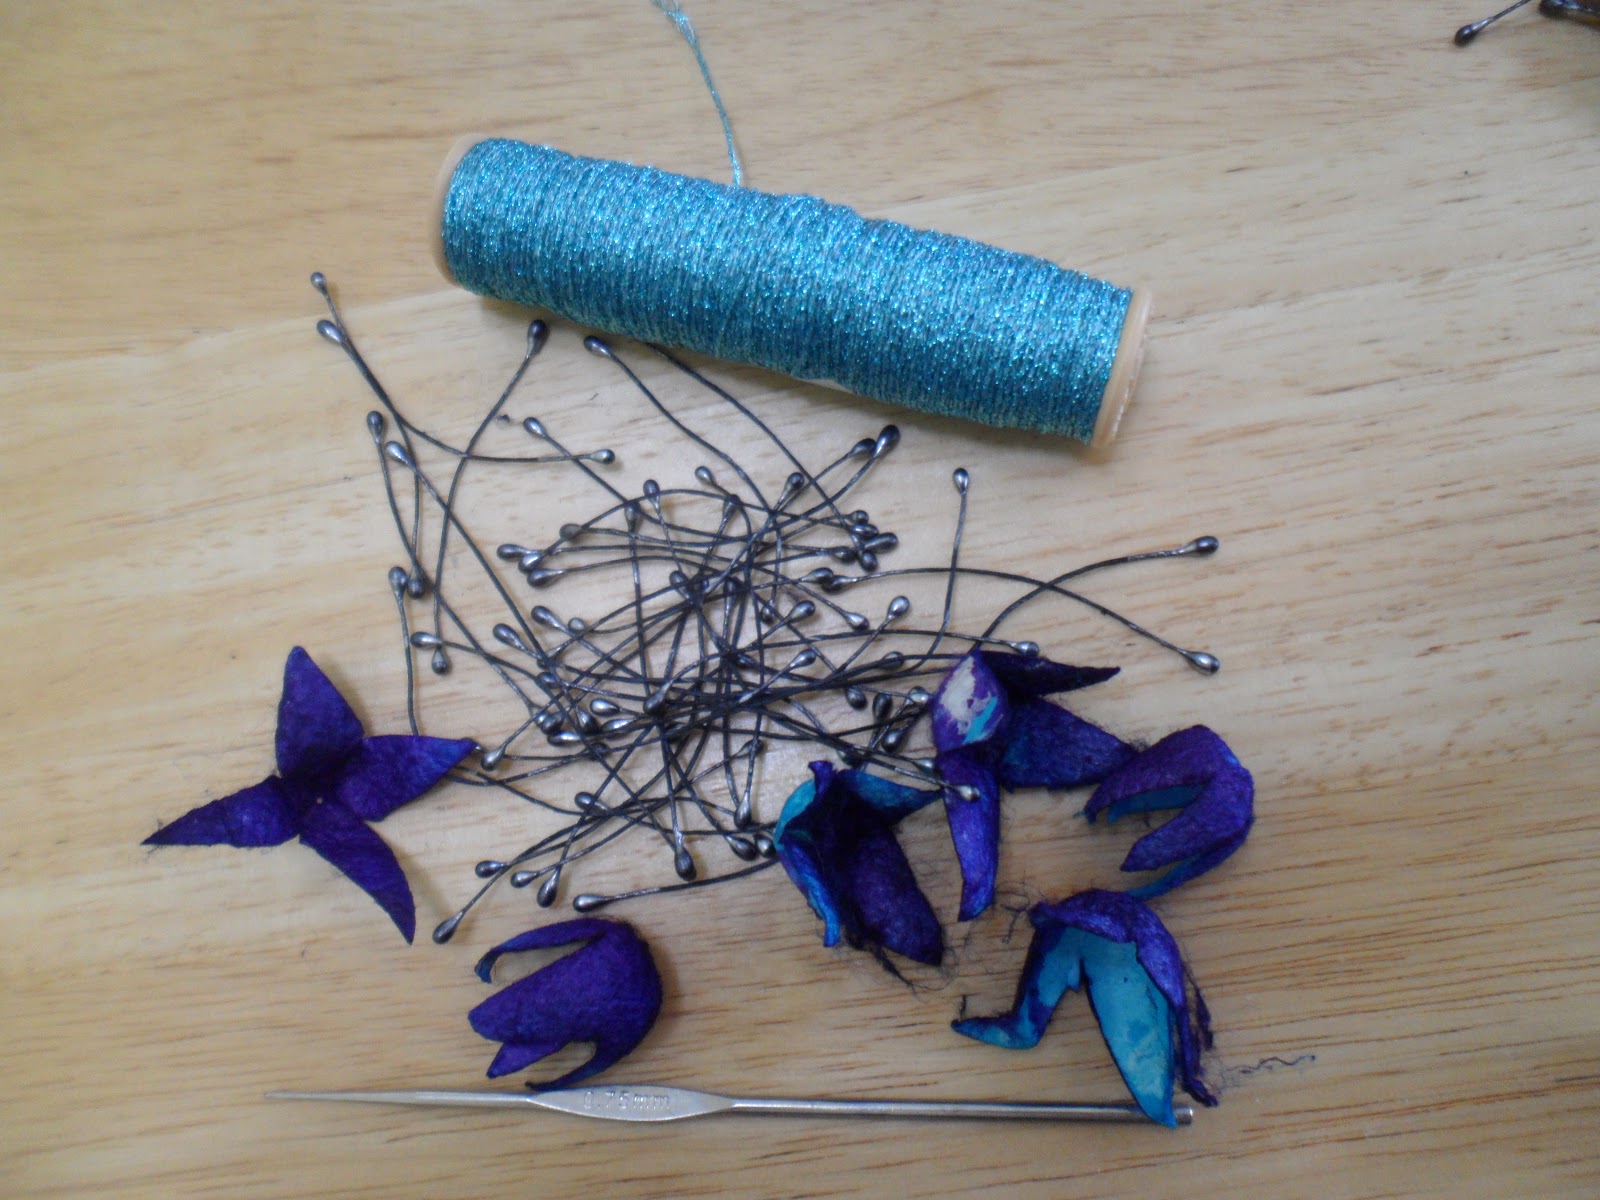
The yarn:
- Handspun yarn plies. One thick and thin ply is great. The other ply needs to be thin or a commercial thread/fine yarn also is awesome.
- Tiny crochet hook (0.75mm)
Making the flowers:

2. Setting up to paint, cover your surface well and set out your paints/dyes. I use steam set silk dyes. Poke a skewer or toothpick through the bottom of each cocoon half and stick the other end into the block of styrofoam.

3. Glove up to protect your skin and now you are ready to
paint your cocoons.
4. Have fun with your paints then set aside to dry
5. Once dry, set according to silk dye manufacturer’s
instructions. What I do is wrap the cocoons separately in [2]paper
towel. Line your steamer with an old towel and then place your cocoons on top
of the towel. Fold the towel over and close your steamer. Do not use anything you use for food. I picked up a great steamer
at a thrift shop I only use for crafts. Once the dye setting process is
complete (approx. 20 minutes), you can remove the cocoons and whilst still a
little warm and pliable, you can shape the petals.
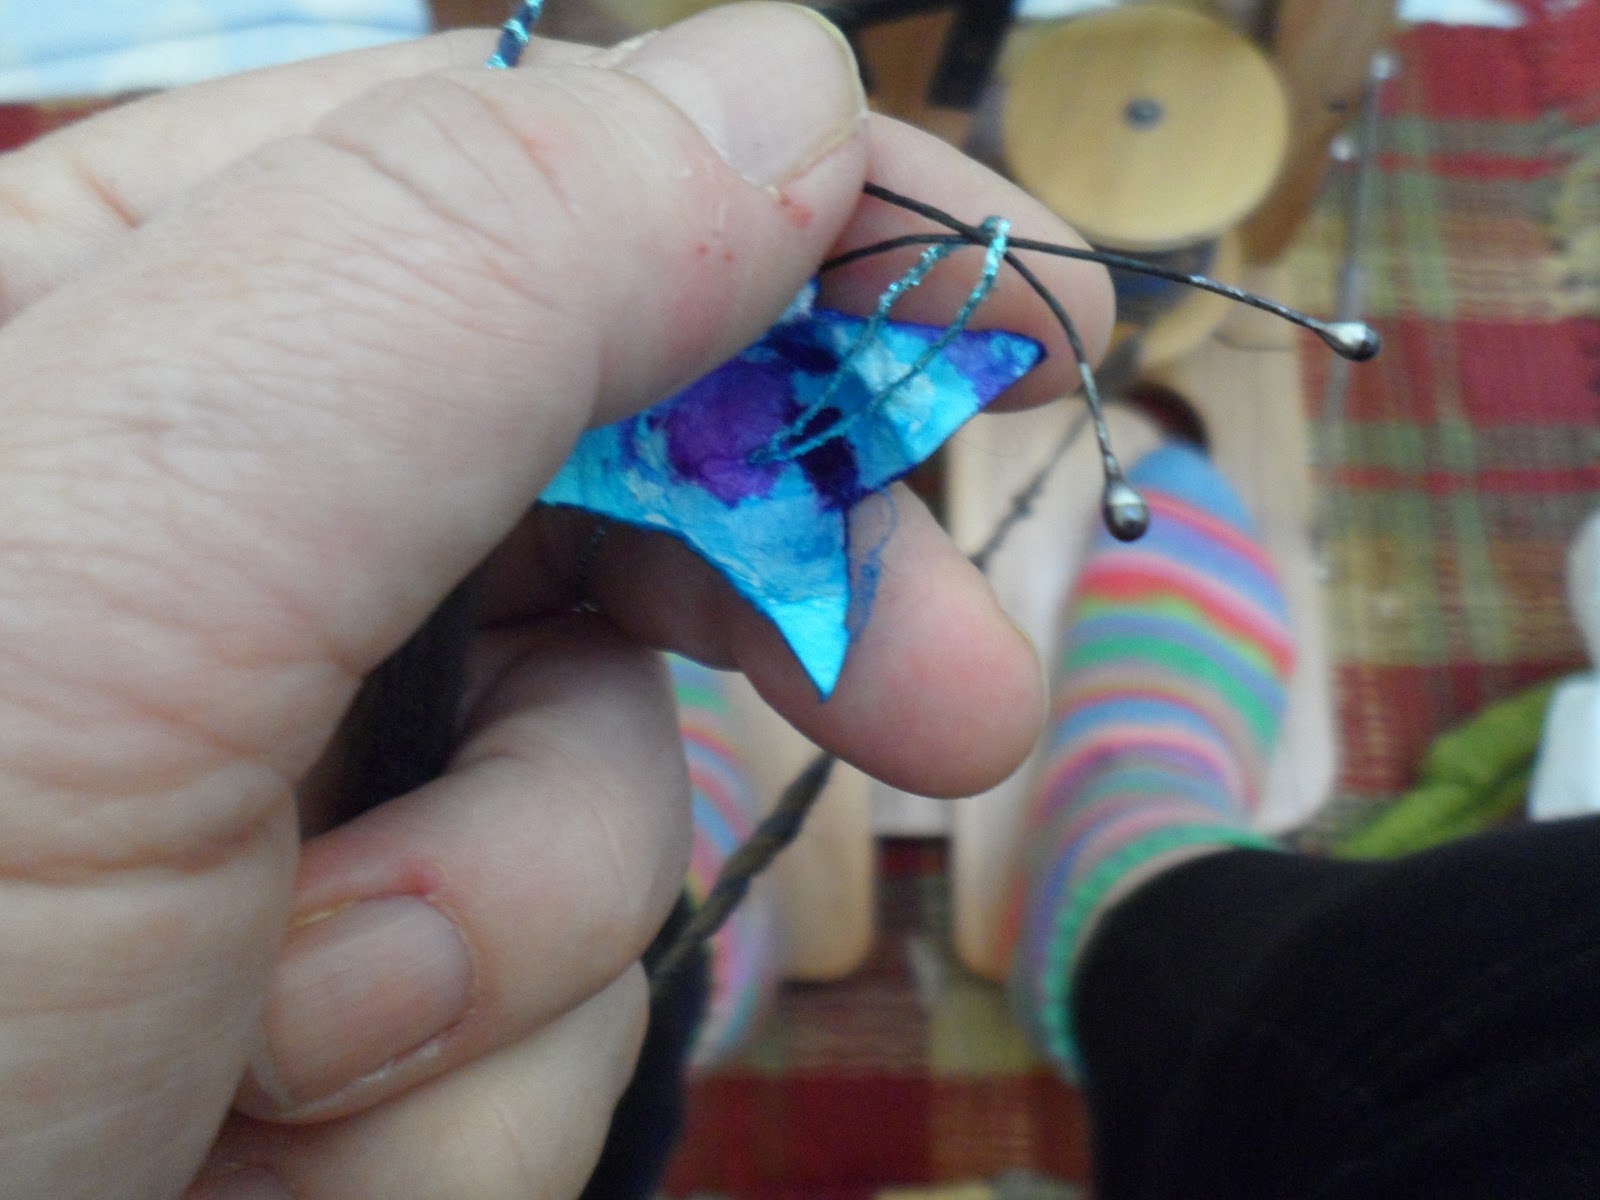
Now I guess you want to know just how to get them on the yarn, eh?
1.
Your plies are of course your own choice
but I will say in order to aesthetically balance the yarn, I recommend one
thick or thick/thin ply and the other a thin one. The thin ply is what you will
be adding the flowers to as you go. For the pictured example I used a
commercial metallic filament.
 2.
I add approximately 12 cocoon flowers
per 2oz handspun but this is entirely up to you. I also add it randomly
so…..start plying and stop in a [3]thin
section of the thick/thin ply when you want to start with your [4]first
cocoon.
2.
I add approximately 12 cocoon flowers
per 2oz handspun but this is entirely up to you. I also add it randomly
so…..start plying and stop in a [3]thin
section of the thick/thin ply when you want to start with your [4]first
cocoon.
3.
Insert your crochet hook from the inside
of the flower to outside through the hole put in earlier during the painting
process.
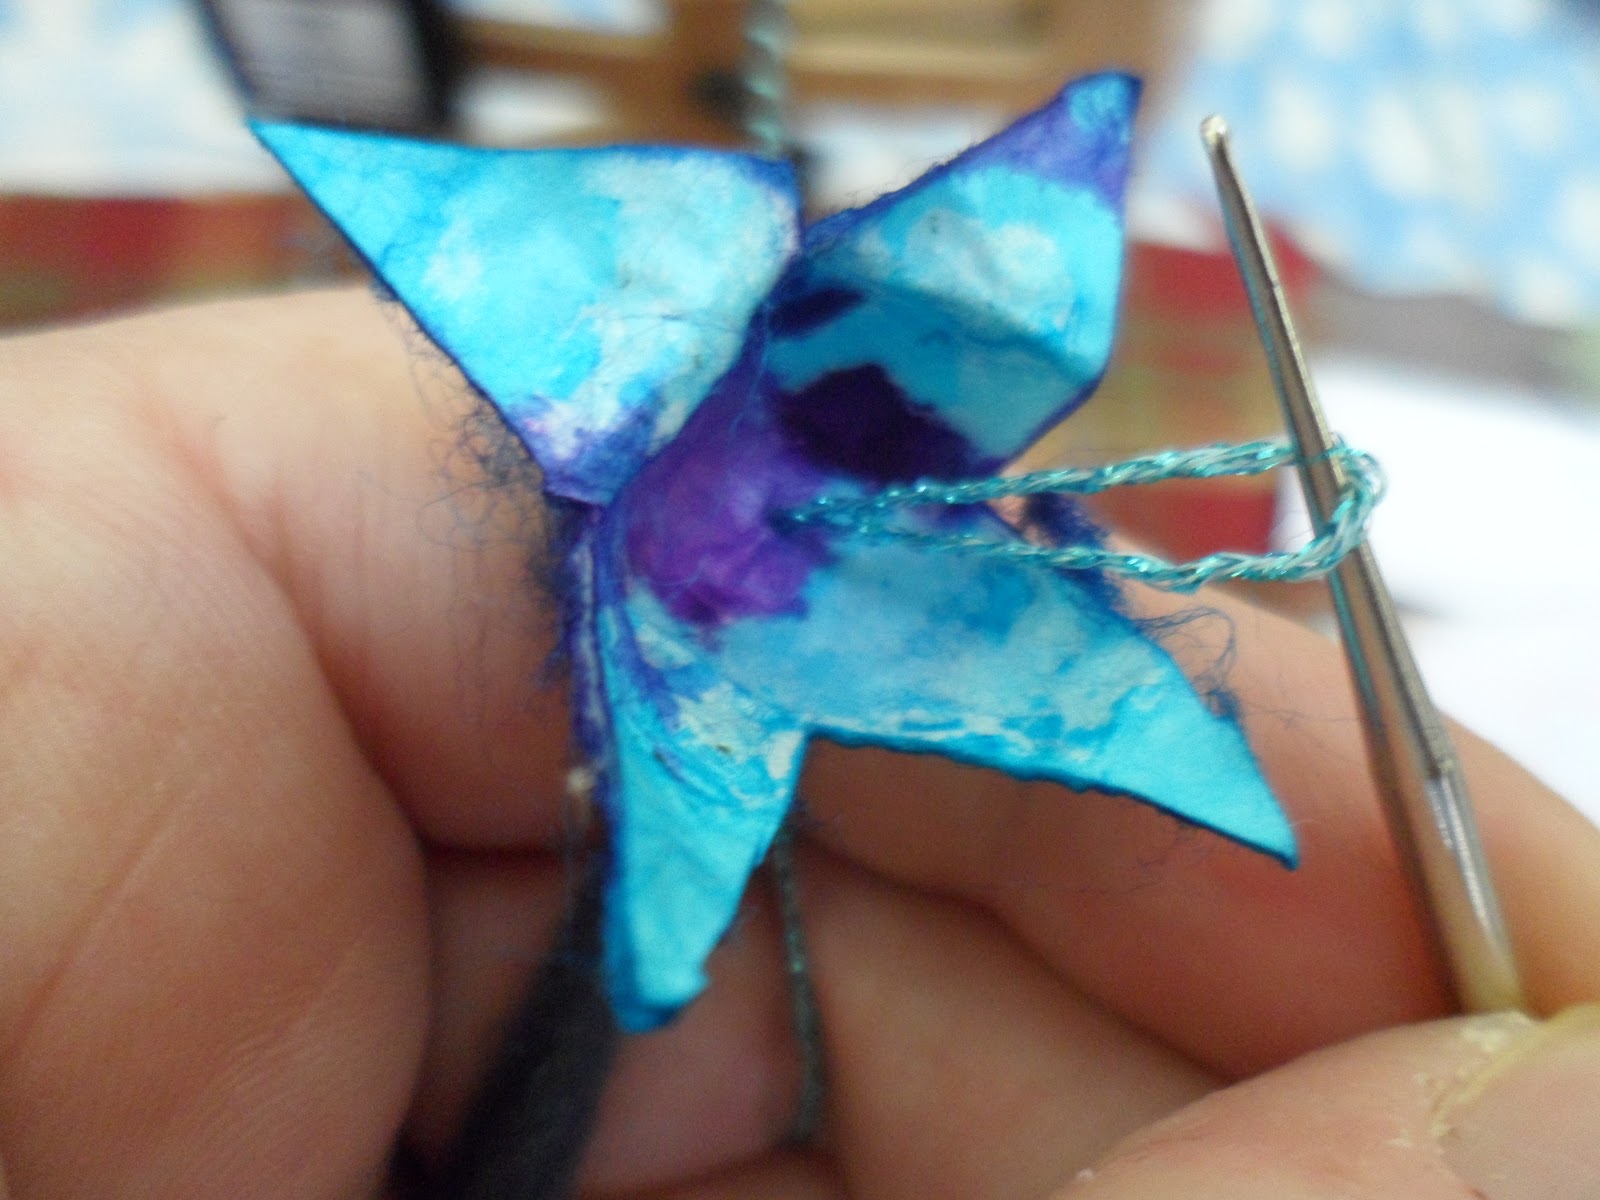
4. Catch your thin coordinating ply and pull it through the hole into the inside of the flower.
 5.
Insert 2, 3 or how many stamens you want
through the loop of the ply you just pulled through.
5.
Insert 2, 3 or how many stamens you want
through the loop of the ply you just pulled through.

6.
Fold the stamens in half and pull the
ply at the back of the flower firmly. This secures the stamens inside the
flower.

So Mara and others, this is how you do it but if you have
any questions or get into any trouble with my directions, please do ask. It
really is quite easy and opens up oodles of possibilities for adding you your
yarn with the same technique. You could always add a bead instead of the
stamens or lock all kinds of goodies with a loop in your plying. Please enjoy
and I would love for you to share your yarn pictures.


[1]
Thanks to Dotty for proof reading and handy hints.
[2] Or
you can use tissue paper. There will be some dye transfer to the paper so that
the paper makes awesome wrapping paper afterwards.
[3]
The flowers ply in more securely on a thin ply than the fluffier thick part of
the ply
[4] Keep in mind if you want to use your yarn
beyond it being a finished skein for anything that may require a longer leader.

